Multipurpose Monocular Heads Up Display (Part 1)
Now, this is a project I’ve had in the works for quite some time… It started out simply as a clever way to read Twitch chat whilst doing my professional imaginary spaceship pilot gig, without taking my eyes off what I’m doing, but I believe it has a lot more potential.
I don’t quite know why I didn’t gain traction with it the first time around, since it only took me an afternoon to come up with a working proof-of-concept from nothing… Though I think maybe I wasn’t quite as comfortable with Fusion360 then as I am now, to design the 3D-printed test fixture.
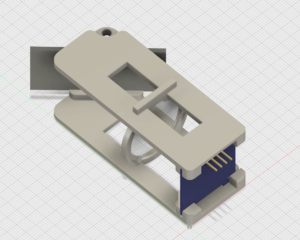
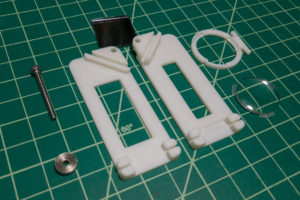
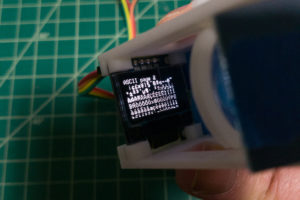
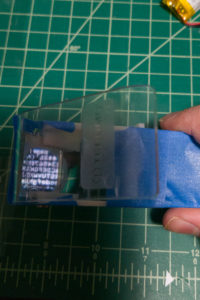
The operating principles are simple enough; the image from an OLED display is focused by a lens element and then reflected onto a transparent surface in front of the eye. So it wasn’t hard to design the test fixture, complete with an adjustable lens, because I wasn’t entirely sure how focal length worked in this scenario.
Thank Science for 3D printing! I ran my usual Ideate→Create→Iterate cycle, turning the initial rough idea into a 3D print, then almost immediately doing it again because something isn’t quite right… Then another because I’ve improved the design… And then yet one more because I want to try a different approach… So on, and so forth.
BOM: Monocular HUD Mk1
| QTY | Description | Notes | Buy | Links |
|---|---|---|---|---|
| 1 | 0.96" 128x64 OLED display, SSD1306 | (White version w/I²C interface.) | Amazon | |
| 1 | Adafruit Feather Bluefruit 32u4 Devboard | (Just what I had on-hand.) | Amazon Adafruit | Downloads Pinouts |
| 1 | 602535 Lithium Polymer Battery, 500mAh (NO CONNECTOR) | (Amazon item is for two.) | Amazon | |
| 1 | Bi-convex lens, Φ25mm, fl=45mm | (Amazon item is for two...and is also no longer available.) | Amazon | |
| 1 | 1" Square Glass Mirror | (Amazon item is for a bag of 25) | Amazon | |
| 1 | 12" x 12" Acrylic See-Through Mirror, 1mm, Scratch-Resistant | (Only need a small strip... Handy for all sorts of projects, though!) | Amazon | |
| 1 | 3D Printed Parts | (COMING SOON!) |
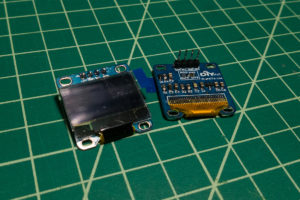
I love these little OLED displays… They’re surprisingly good at displaying tiny text, which is perfect for this application. Sadly 128×64 in a 0.96-inch monochrome display seems to be about the best I can do for pixel density versus pixel count. You pretty much have to choose between more pixels further apart, or less pixels closer together… Can’t really find anything like the tiny 640×480 full-color display Google used in the Google Glass headsets. These displays, at least, are very common jellybean parts, and I’ll be writing a more detailed post on them very soon!
They’re available in both SPI and I²C bus flavors, though I prefer the I²C interface because it only requires two data lines (SDA, and SCL, i.e. DAta and CLock) and VCC/GND supply lines. After an interface, the next consideration is how exactly to go about talking to it in my program. I found a fantastic library called u8g2, which is the second version of U8glib. The variety of fonts available is mind-blowing! It can also pretty easily draw graphics, not just text.
For these initial tests I was using an Adafruit Feather Bluefruit, ATMega32u4-based Arduino board with on-board Bluetooth Low Energy, and a little LiPo battery connector and charging circuitry. I quickly ran into what was going to be the major limitation; the basic “Hello World!” program I had for the display, in English and Chinese, took up 105% of the available program space, because it needed to load the Chinese font into memory along with the libraries.
I set about getting my hands on a couple Espressif ESP32-based devboards—which I’ll talk about in great detail later —because they start out at 4 Megabytes of storage, instead of 32 Kilobytes… (They’re also 15 times faster, have Bluetooth LE and WiFi, and are absurdly small and inexpensive.)
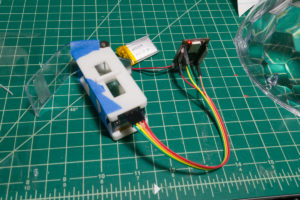
With the electronics more or less figured out, there was more about the physical construction that needed work. I used a couple 1″ square mirrors that I picked up a bag of on Amazon, and a 25mm biconvex lens for a Google Cardboard… But for the imaging surface, all I had was this piece of literal plastic trash that I’d been holding on to for this specific application because it looked like it would do….
Spoiler alert: It did not ‘do’. I was happy to see that it worked at all, so at least my principles were sound… But the image was very faint, and it almost seemed to be exhibiting photoelasticity, but as far as I know OLEDs such as this don’t use polarization, and I wasn’t near my monitor… (EDIT: I am apparently incorrect, according to the data I have on them, their construction does include a polarizer. I guess the photoelasticity effect just isn’t as pronounced as it is with a bigass monitor, because the light intensity is like 60% less?)
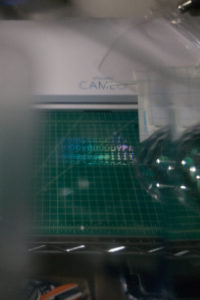
Lackluster result, though the fact that it worked at all was encouraging. (Also, super hard to photograph!)
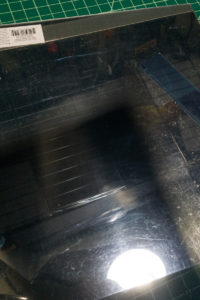
The first time I had this idea, I knew I was probably going to have to use some one-way mirror tinting film or something… This time I actually managed to find some one-way mirror acrylic, specifically some 1mm thick sheet, scratch resistant… It wasn’t particularly cheap—just over twenty bucks with the added overnight shipping —but it was definitely what I needed, as it is highly reflective, giving a perfect mirror finish when the protective film is removed, and fairly easy to see through…with probably only a 10-15% loss of light transmittance at most.
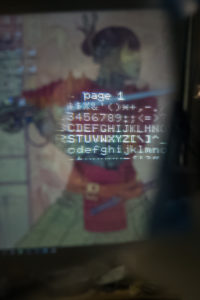
Drastically improved imaging with the one-way mirror acrylic. (Though still hard to focus on with a phone!)
That’s it for Part 1… In Part 2, we’ll look more at the ESP32, examine some alternative optical strategies, and various other tomfoolery.

