Iterative Designn. The process of testing and redesigning an idea until it works like it was supposed to in the first place.
Have an idea for a thing. 💡
Make the thing. 😄
Realize the thing isn’t right. 🤨
Redesign the thing. 🤔
Repeat 2 through 4 until a desirable outcome is reached, you give up, or you lose your damned mind. 😫
Ideate→Create→Iterate.
By bringing modern ‘rapid prototyping’ capabilities to the desktop, consumer 3D printing has enabled a level of iterative design straight out of Star Trek.
I hope to use this category to write case studies, following the journey from need/idea, through prototyping and the inevitable redesigns, to finished part.
The following are my current projects that will be written up soon:
Flight Stick — A 3D-printed flight stick. (Design from Cults3D)
Rudder Pedals — A set of 3D-printed rudder pedals off Thingiverse.
Mechanical 7-segment display — A clockwork display module. (Design from Cults3D)
HUD Monocle Mk2 — Second prototype version of my monocular heads up display. Using a prism to achieve a vastly simplified optical path and smaller footprint. (And an ESP32 for electronics!)
Other upcoming content:
ESP32 Part 2 — Follow-up to my previous post about the ESP32 SoC.
New Filament! — Review of recent 3D printer filament acquisitions
RGB Ring Diffuser — A mini-blog about the 3D printed RGB LED ring diffusers I made
Magic Making Machines — A post about practical 3D printing, demonstrating the iterative design process of a practical print.
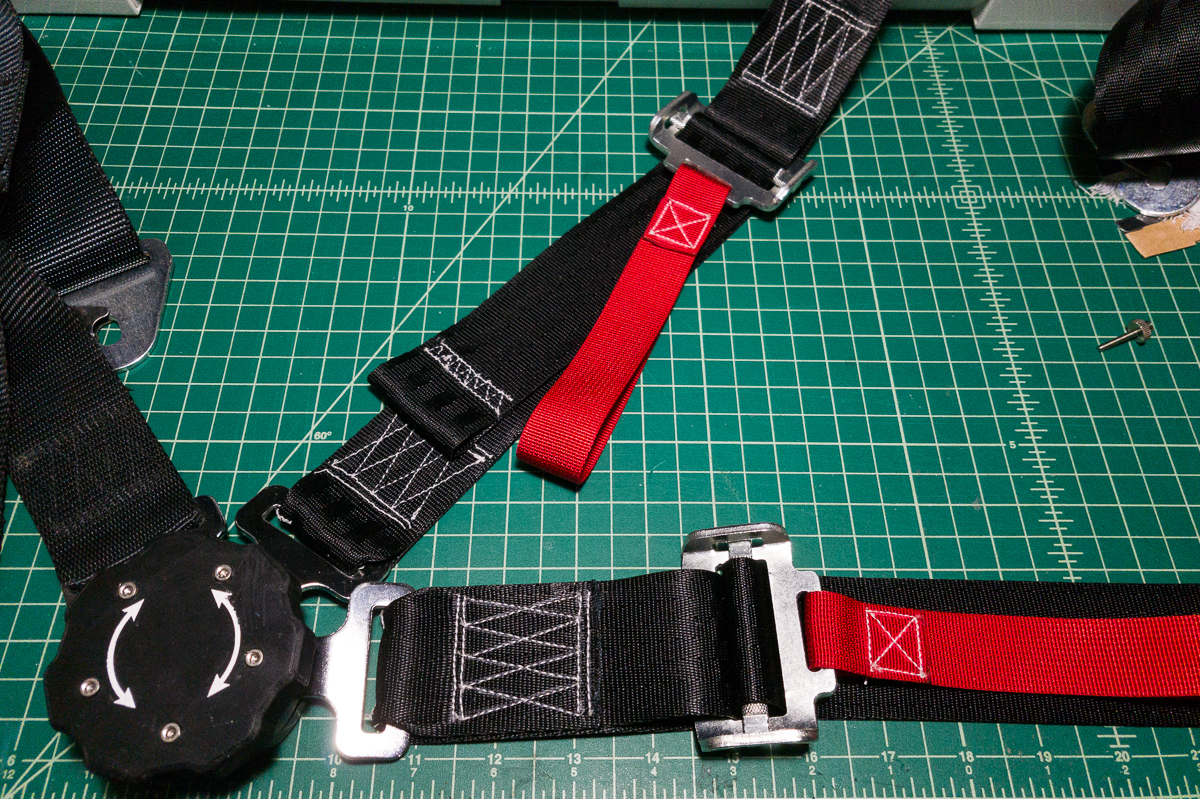
It is well-known that I take my life as a professional imaginary spaceship pilot a little too seriously. Like “4-point harness on my computer chair” seriously. And while I certainly liked the old version of the harness, it was missing something; It was just a little too simple.
I’m not sure I’ve talked about it before, so I’ll take a minute here before moving on… I was originally planning on making a 4 or 5-point harness from scratch, and actually designed my own cam-lock release mechanism, but my 3D printer at the time simply wasn’t up to the task, and the prototype’s flimsiness really dissuaded me from the idea.
It was a little while after this that I found a 4-point racing harness on eBay for under $30…cheap enough that I wouldn’t trust it with my life, but in my case, it’s just a prop. I replaced all the plain nylon webbing with proper seatbelt-weave webbing which looked much better, and added little pull straps in red. All the new stitching was also done in a contrasting mil-spec bonded nylon thread.
Finally I 3D printed a knob to go over the release lever…which required filing off the protruding lever, and drilling holes in the face of the cam lock plate. For the last added touch, I cut some paint-mask vinyl on my Silhouette Cameo 3, and used that to paint markings on the knob.
It did the job and I rather liked it, but now that I have the new printers, I wanted to give it another go. I recreated the original knob I had designed for a far earlier incarnation of the project and printed it in some bright red eSUN PLA+
I think the results speak for themselves. 😏 At some point I’ll probably do it again, just to add the arrows back in as actual 3D printed inlays. Though I should probably also prime, sand, and paint it next time for an even more polished look…not that there’s anything wrong with the raw print…especially when viewed anything but up-close.
While my father was still rehabilitating until he could get around well enough on his own to come home, I was making use of my new 3D printers.
I had just gotten some of this fantastic new ‘silk shine’ metallic filament from CC3D, and decided to print him a little Buddha in bronze. The CC3D filament looks absolutely stunning. Pictures don’t really do justice to just how well it shimmers. It’s not sparkly or otherwise fake-looking, it has a fairly authentic metallic sheen. I’m curious to know how they achieve it!
(The bronze is actually more green than it appears in these images. I didn’t catch the Auto Balance shenanigans until it was already uploaded, and it wasn’t a big enough deal to fix it. I wish CC3D offered a ‘brass’ filament that looked like this, but so far they don’t.)
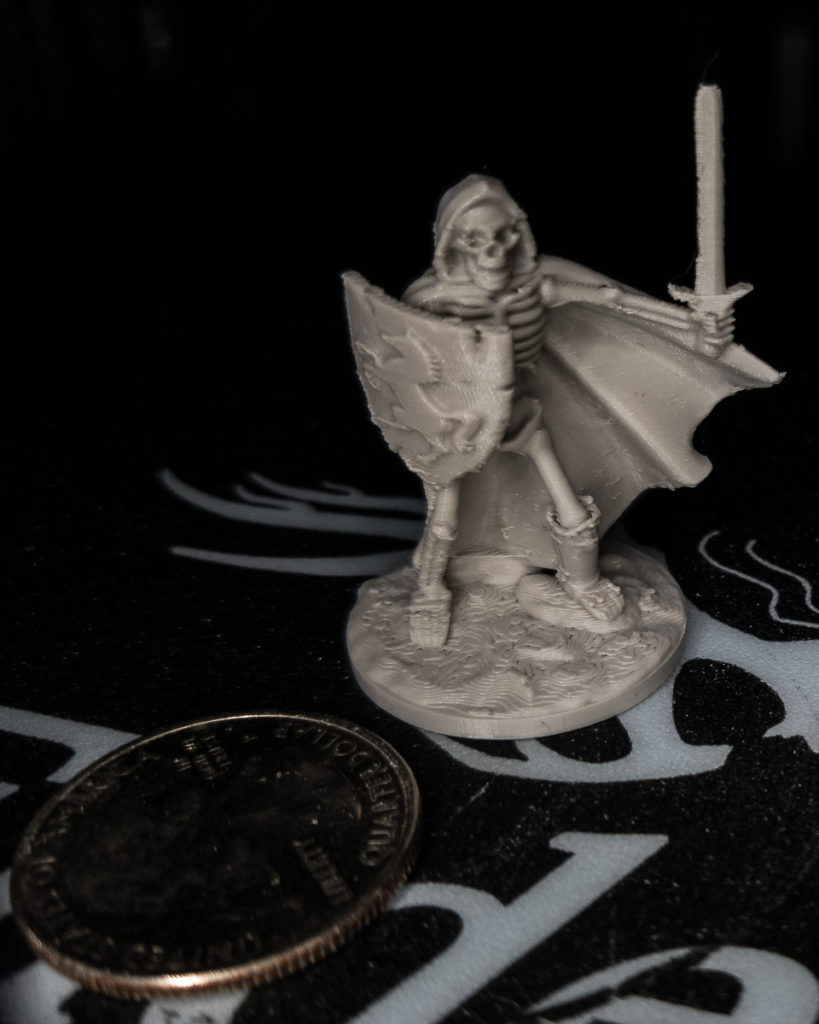
One of the reasons I settled on the Creality Ender 3 Pro—and in fact, literally doubled down on that decision —was the recommendation of several YouTube channels dedicated to printing tabletop gaming miniatures and terrain, as well as Fat Dragon Games, makers of some truly superb miniatures and modular terrain, whose Kickstarter I backed.
So of course I printed some minis from the campaign…which turned out spectacularly, considering the printer was basically fresh out of the box and all I did was level the bed. They even print with no supports!
I never imagined that an FDM printer could produce results like these—nevermind a $250 FDM printer —especially straight out of the box! These are results which approach that of SLA and MSLA printers…which is a subject we’ll definitely be revisiting. Count on it.
Now, this is a project I’ve had in the works for quite some time… It started out simply as a clever way to read Twitch chat whilst doing my professional imaginary spaceship pilotgig, without taking my eyes off what I’m doing, but I believe it has a lot more potential. Read more…
Hey! A post EARLY?! Surely a sign of the apocalypse.
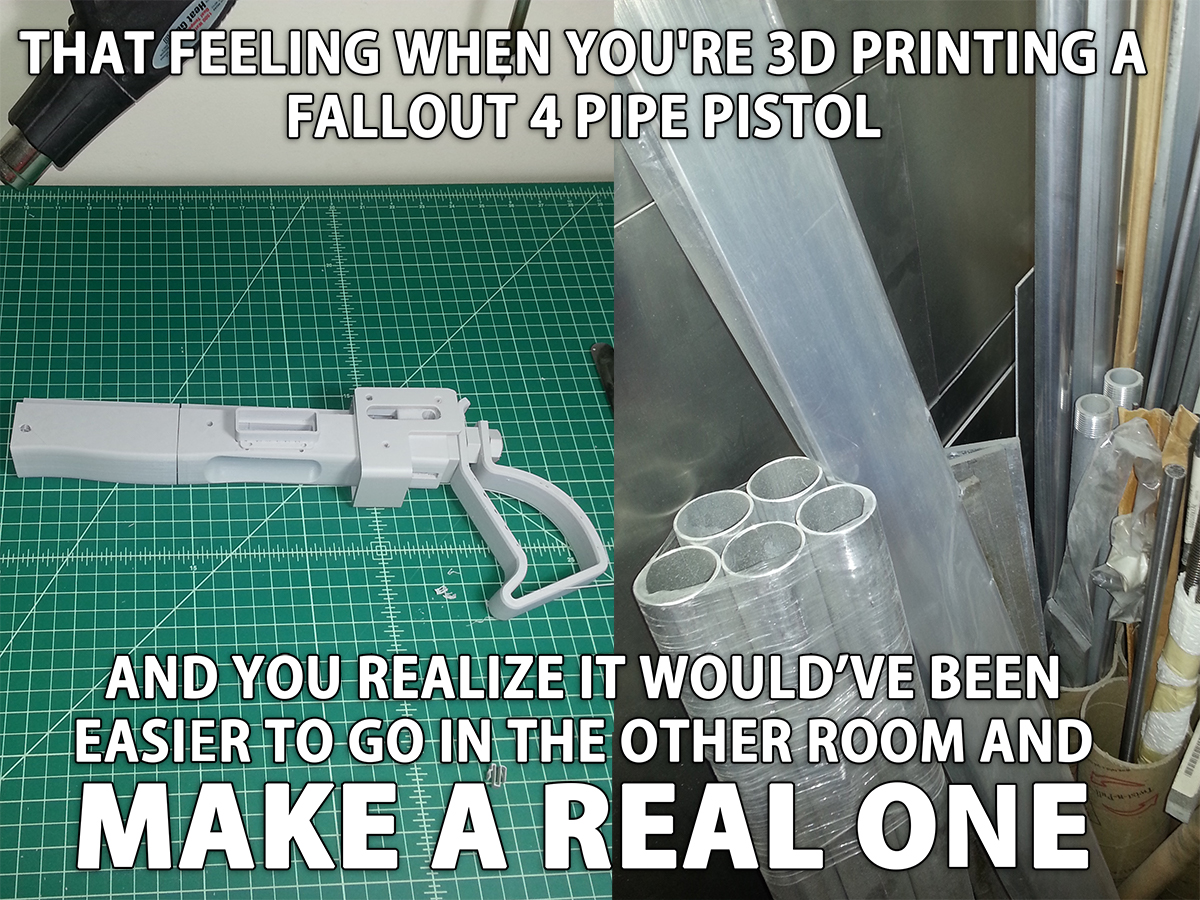
And Probably Faster, too…
So I’m currently working on this wonderful Fallout 4 Pipe Pistol by lilykil. I’m still in the process of printing it, after which will follow the sanding and priming, and finally the painting and weathering!
I’ll update this post with additional 3D printery as it happens, and then make a new post once I get to the painting stage.
Sorry for the potato pics, but it is pretty convenient just being able to snap pics from a phone and upload them to the blog when it’s for unimportant stuff.
One spool down!
Well, it’s taken well over a year and a half, but I finally reached the end of a spool of a filament. Until now it seems I’ve just used some of each of my 40+ spools. But I’ve settled on Push Plastic light grey for printing props, because it just prints so nicely, and it shows up great on camera…so it wasn’t long before I used up my first spool.
Luckily there’s more where that came from!
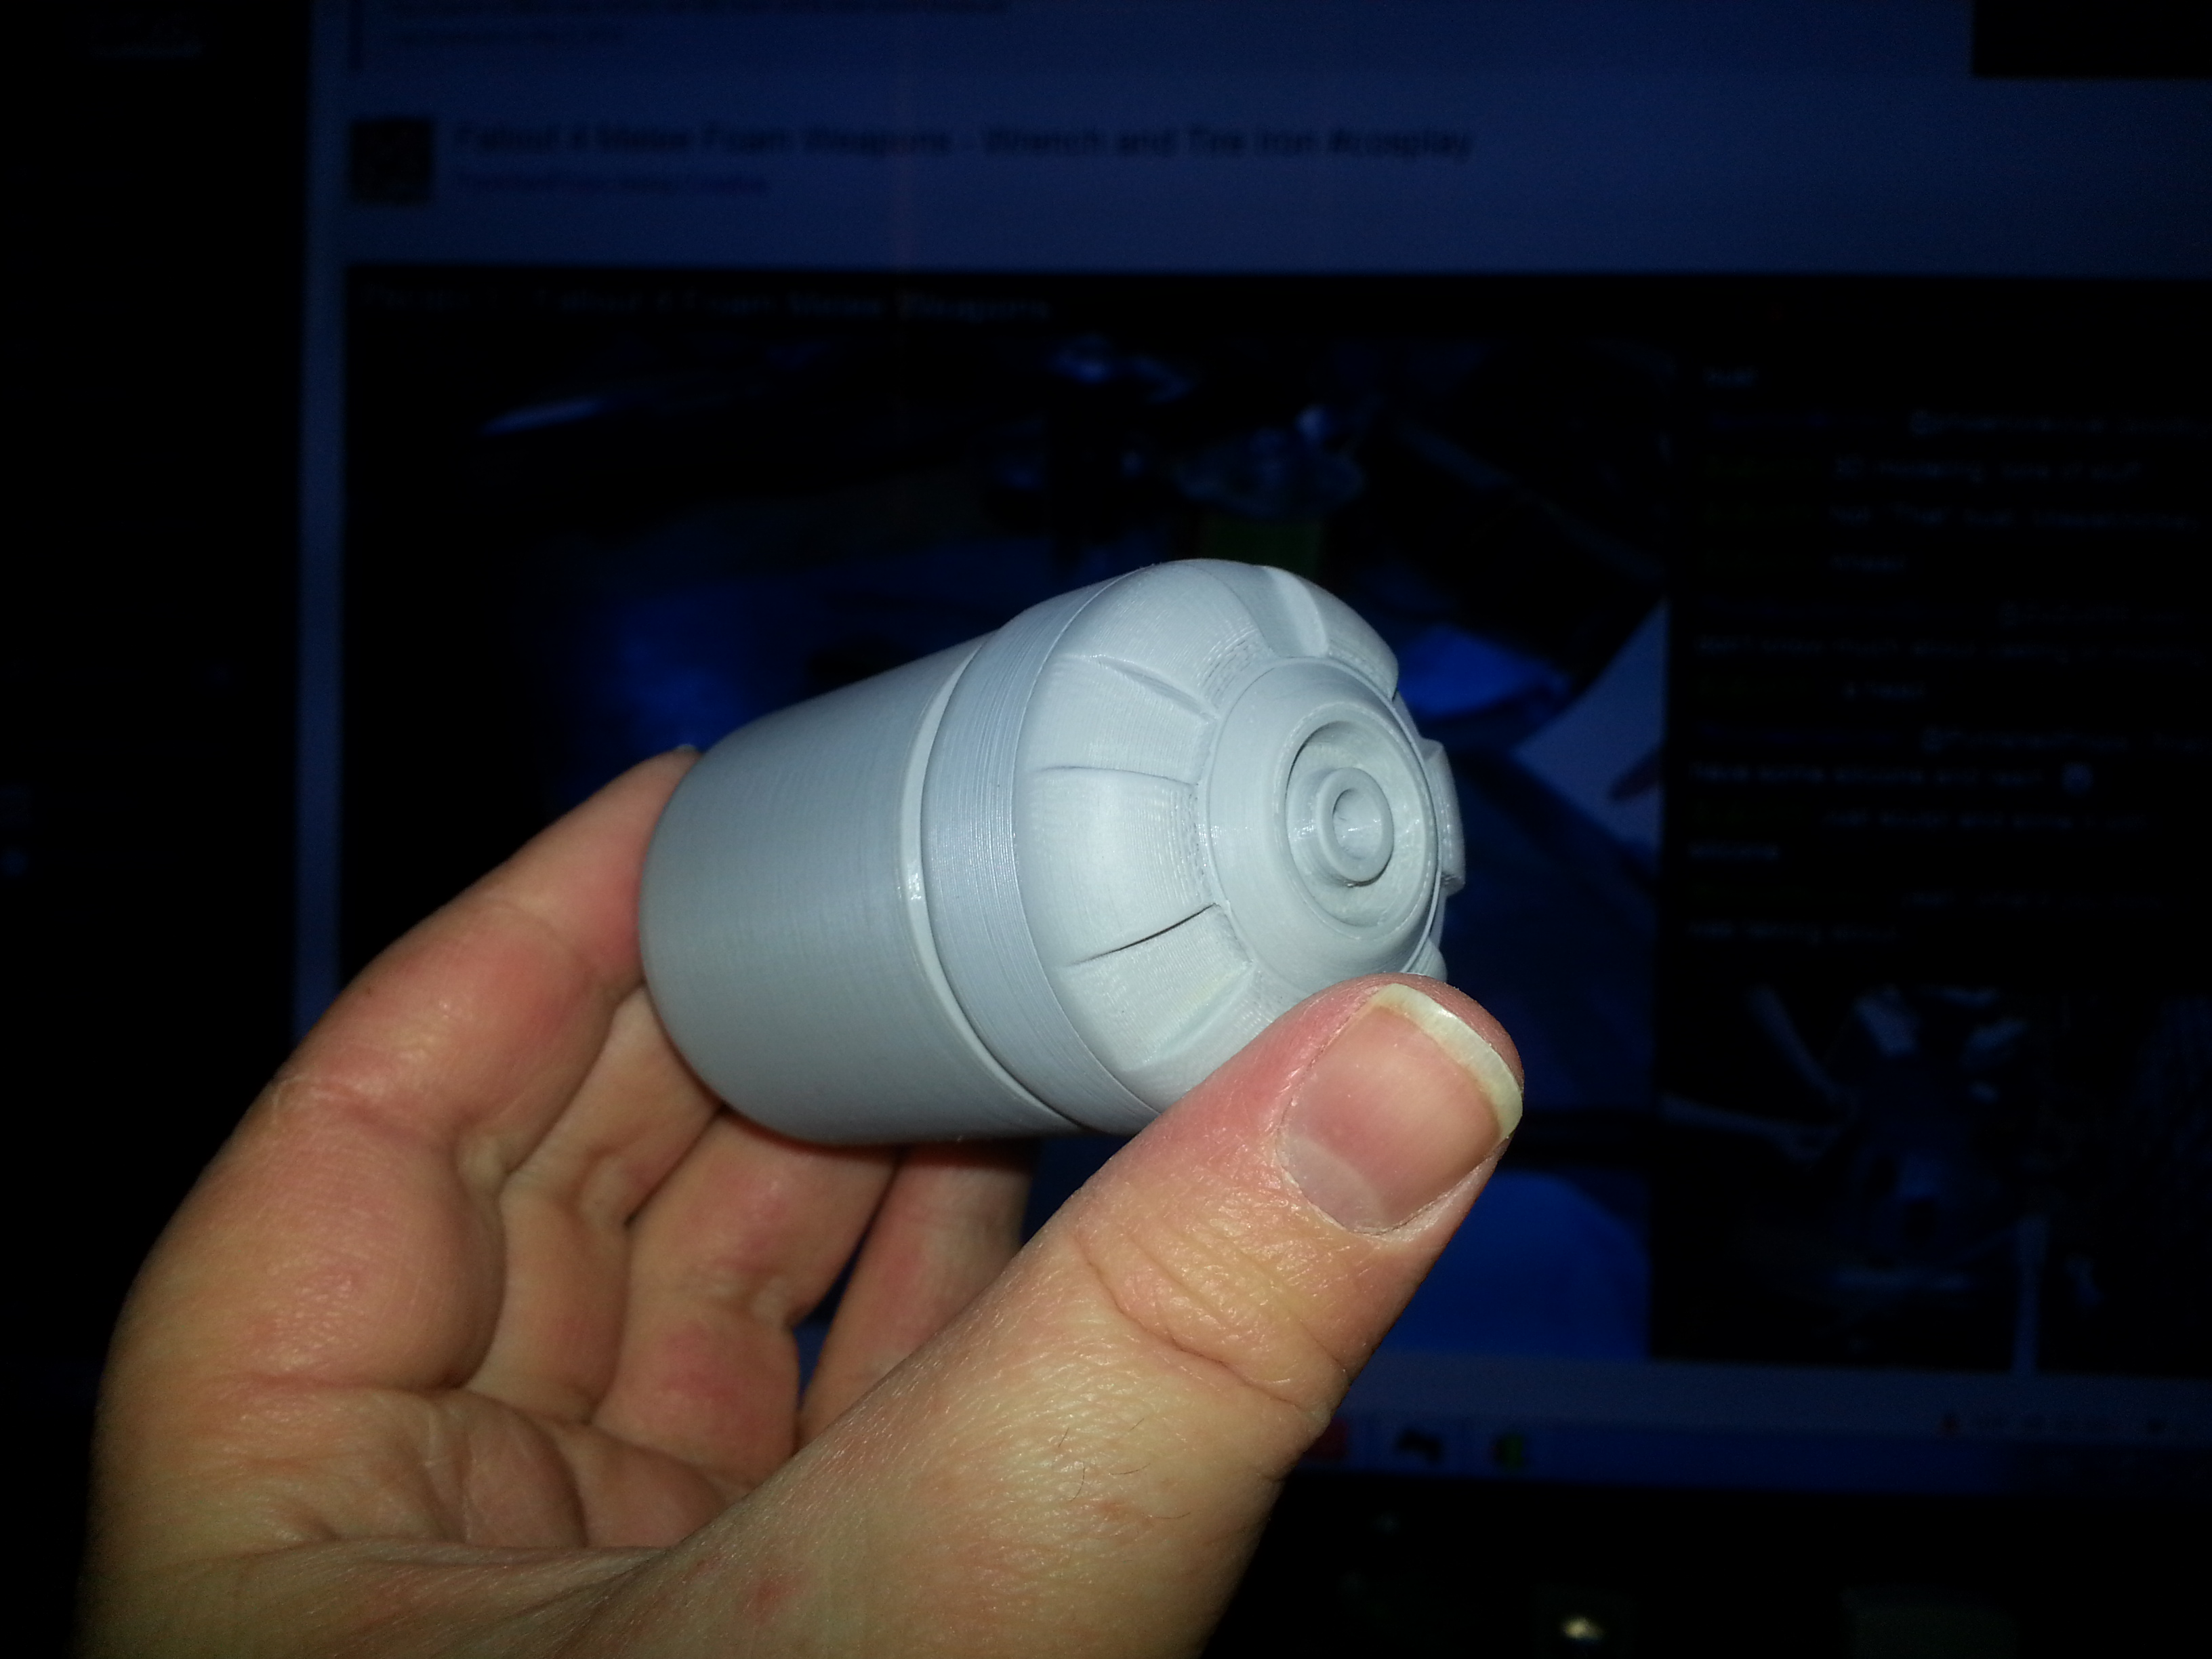
So I’ve been working on some Fallout 4 stuff. Fusion Core, Fusion Cell, etc. The Fusion Core I found was the wrong size, like obviously so… It needed to be like 33% bigger, so I upsized it, and printed it in several pieces so they could all printed oriented in the best way. The Fusion Cell is just sort of…wrong. I’m going to have to model my own, again. After this I plan to finish my 10mm before I move on to bigger and awesomer things.
Original Fusion Core, rather small!
Fusion Cell
Upsized Fusion Core, and original Fusion Core.
I’m going to have to sand, glue, and spot-putty the fusion core sections together.
HAHAHA! I POSTED ON TIME! TAKE THAT! (゚∀゚)アハハ八八ノヽノヽノヽノ \ / \/ \
I’m getting the ball rolling on a lot of stuff this month, from the MAKE COOL THINGS livestream and YouTube channel, to some prop making, to maybe even doing a little work on a simple fun little game project I’ve had in mind for a while… See a breakdown of this month’s acquisitions after the jump! Read more…
First of all, let’s take a moment to talk about prop making; It’s something that I have a real interest in but I can never seem to afford moldmaking and casting supplies… Well, I’m not going to let that stop me from making some props before I have the ability to duplicate them.
Right now, my biggest obstacle– putting aside money issues and for the moment just looking at what I have –is the surface quality of my 3D prints. To that end I spent some money on some basic necessities like Bondo body filler, Bondo spot putty, some quality automotive wet/dry sandpaper, and a sanding block. Bill Doran has a great video on using Bondo, and his video on preparing mold masters also contains some applicable info.
Propaganda! By which I mean videoblogging! I just got a cheap little steadicam thing for my video camera so I can do handheld shots that are actually stable. It’s really quite something.
Programming! I’ve got some cool Arduino ideas I want to play with, one of them is inspired by this cool post I found about making an Arduino Wi-Fi scanner that displays the SSIDs of open wifi APs on a little OLED display.
Projects! I’ve got a 3D printing and prop making project in the works based on my current favorite videogame; Tom Clancy’s The Division, which inspired an additional project which I can’t talk about right now… ;D


