Week 37, 2015 – Everything’s (not) Ruined Forever!

So… That went well.

I ended up with a hard plug of PLA in the teflon tube of my printer’s hotend, and trying to clear it I mangled the teflon tube.  Of course, to get even that far, I had to completely disassemble the hotend.  And since I was doing that, I figured it was a good time to replace the thermocouple on the left extruder. And since I was doing that, I figured I’d do some upgrades I’d been planning on. And since I was doing that, I figured… Yeah, the slope just kept getting slipperier and slipperier.

Things didn’t go terribly as you can can see in the few pictures I took…  Nonetheless, things were not working correctly.

Dual-extruder assembly removed from printer.

Dual-extruder assembly removed from printer.


Old thermocouple unplugged from MightyBoard.

Old thermocouple unplugged from MightyBoard.

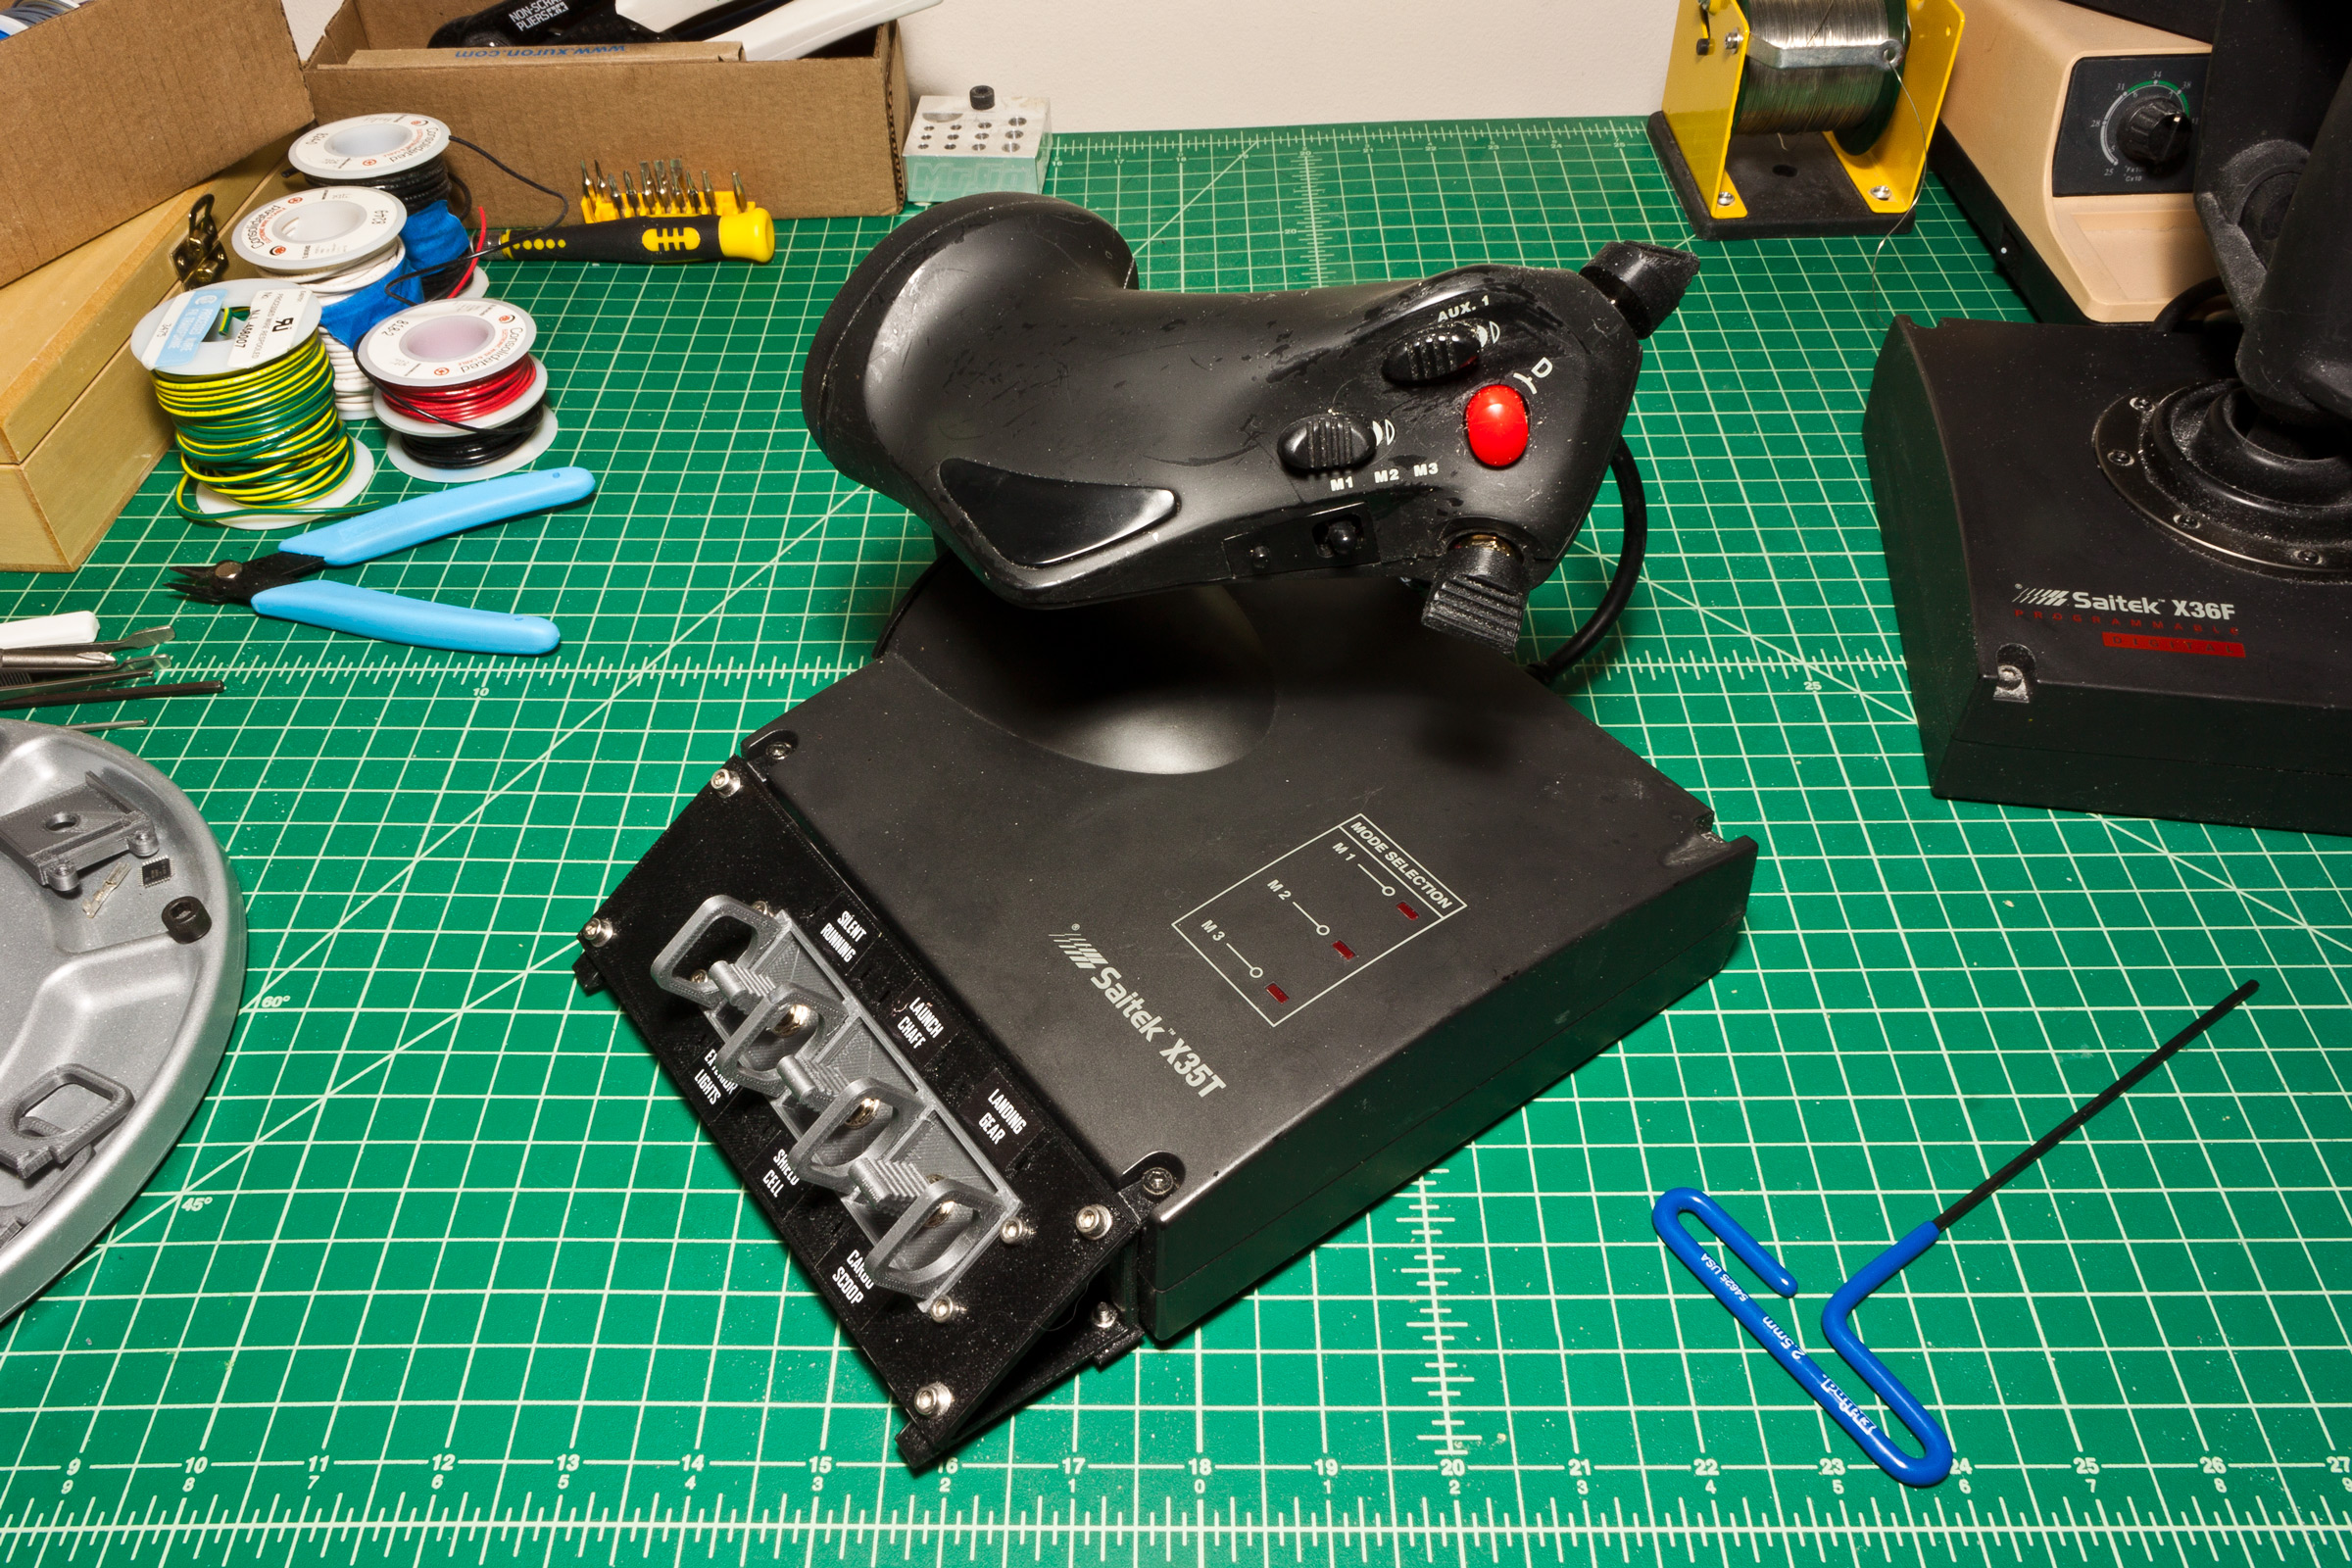
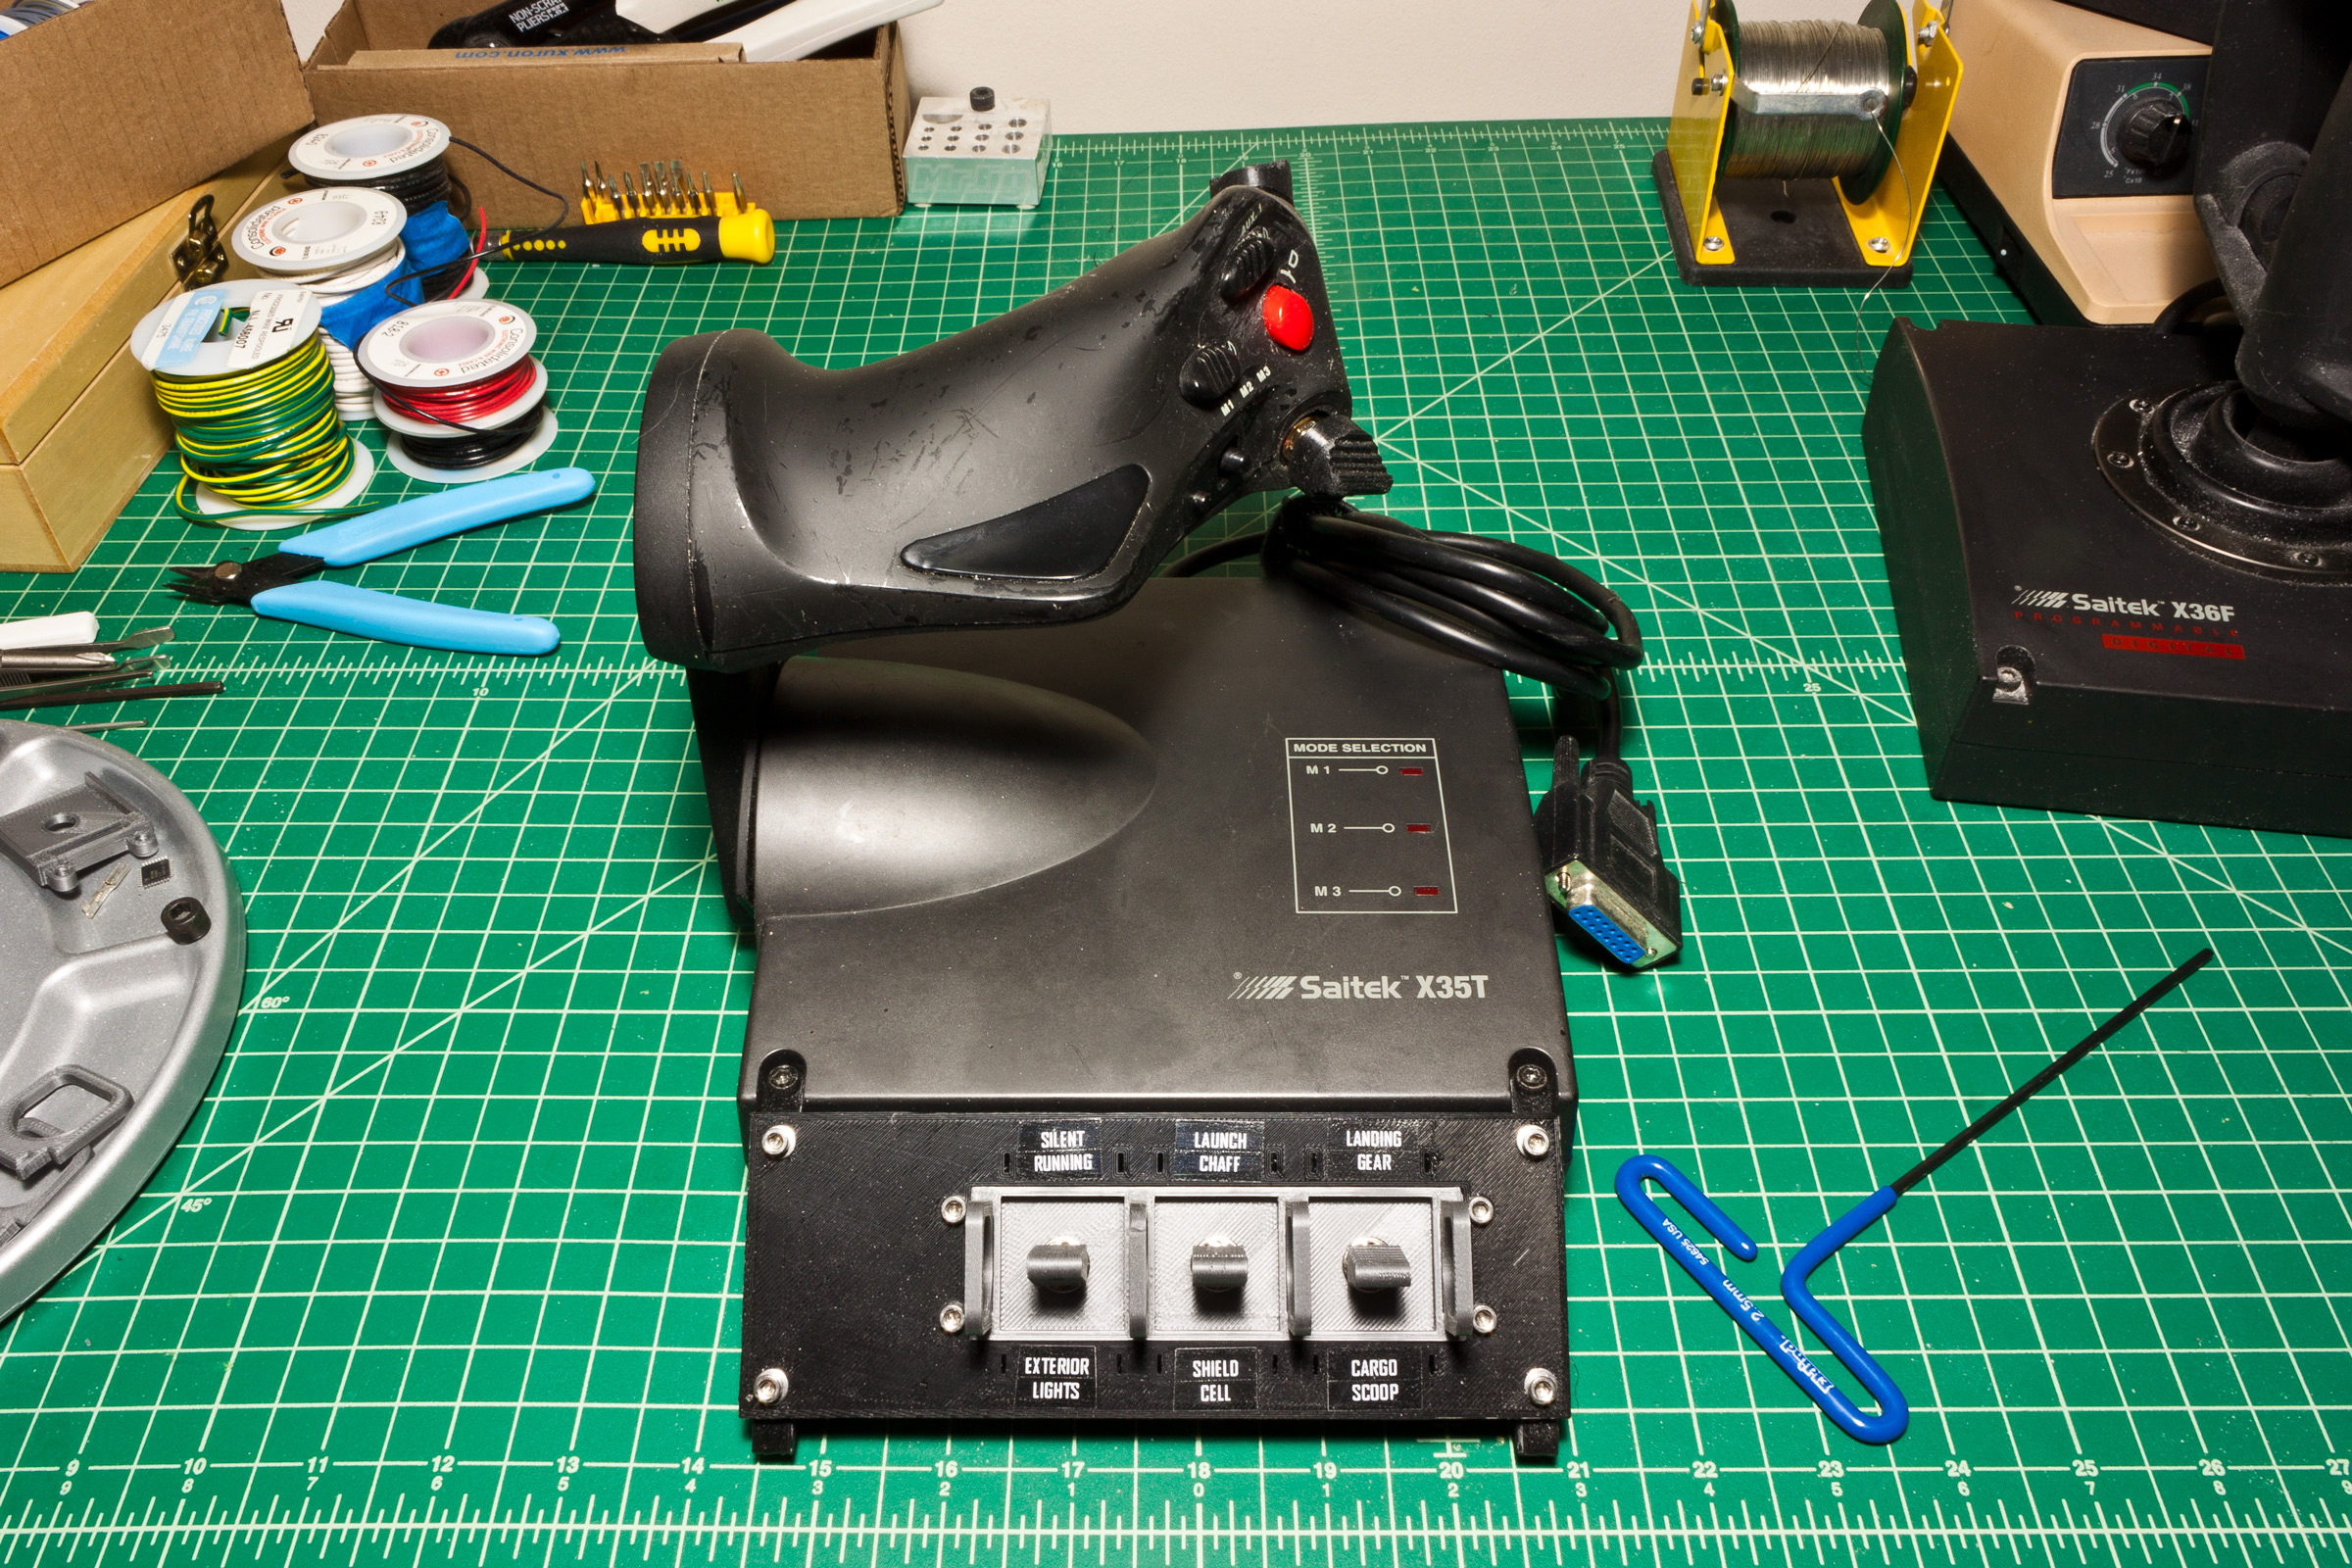
So, I got it back together, with some modifications…  I like the replacement top plate… The 3D-printed strain relief for the cable bundle and the pneumatic press-fittings for the PTFE bowden tubing are fantastic additions.  However, the spring I used in the new 3D-printed extruder was not up to the task and was simply not capable of extruding anything…

Partially re-assembled extruder.

Partially re-assembled extruder.

I ended up disassembling and reassembling the whole thing two or three more times before I got it back up and running.  Still, I’m not happy with the hotend barrels I got off Amazon, they have PTFE linings with a 2mm ID and 4mm OD, and are threaded full-length.  The original barrels only had threads at the end, the rest was smooth, and used PTFE tubing with a 2mm ID but a 3mm OD, and the temperatures and behavior of the new parts were very different.  Also, the original nozzles butted up against the barrel, but the PTFE tube extended down into the nozzle…  The new barrels’ linings don’t stick out…but I do have additional nozzles designed to interface like that…so I put those on there.  Nonetheless, I’m going to try and get some 3mm OD tubing.

UPDATE 2015-09-16: Teflon Tubing Trials and Tribulations.
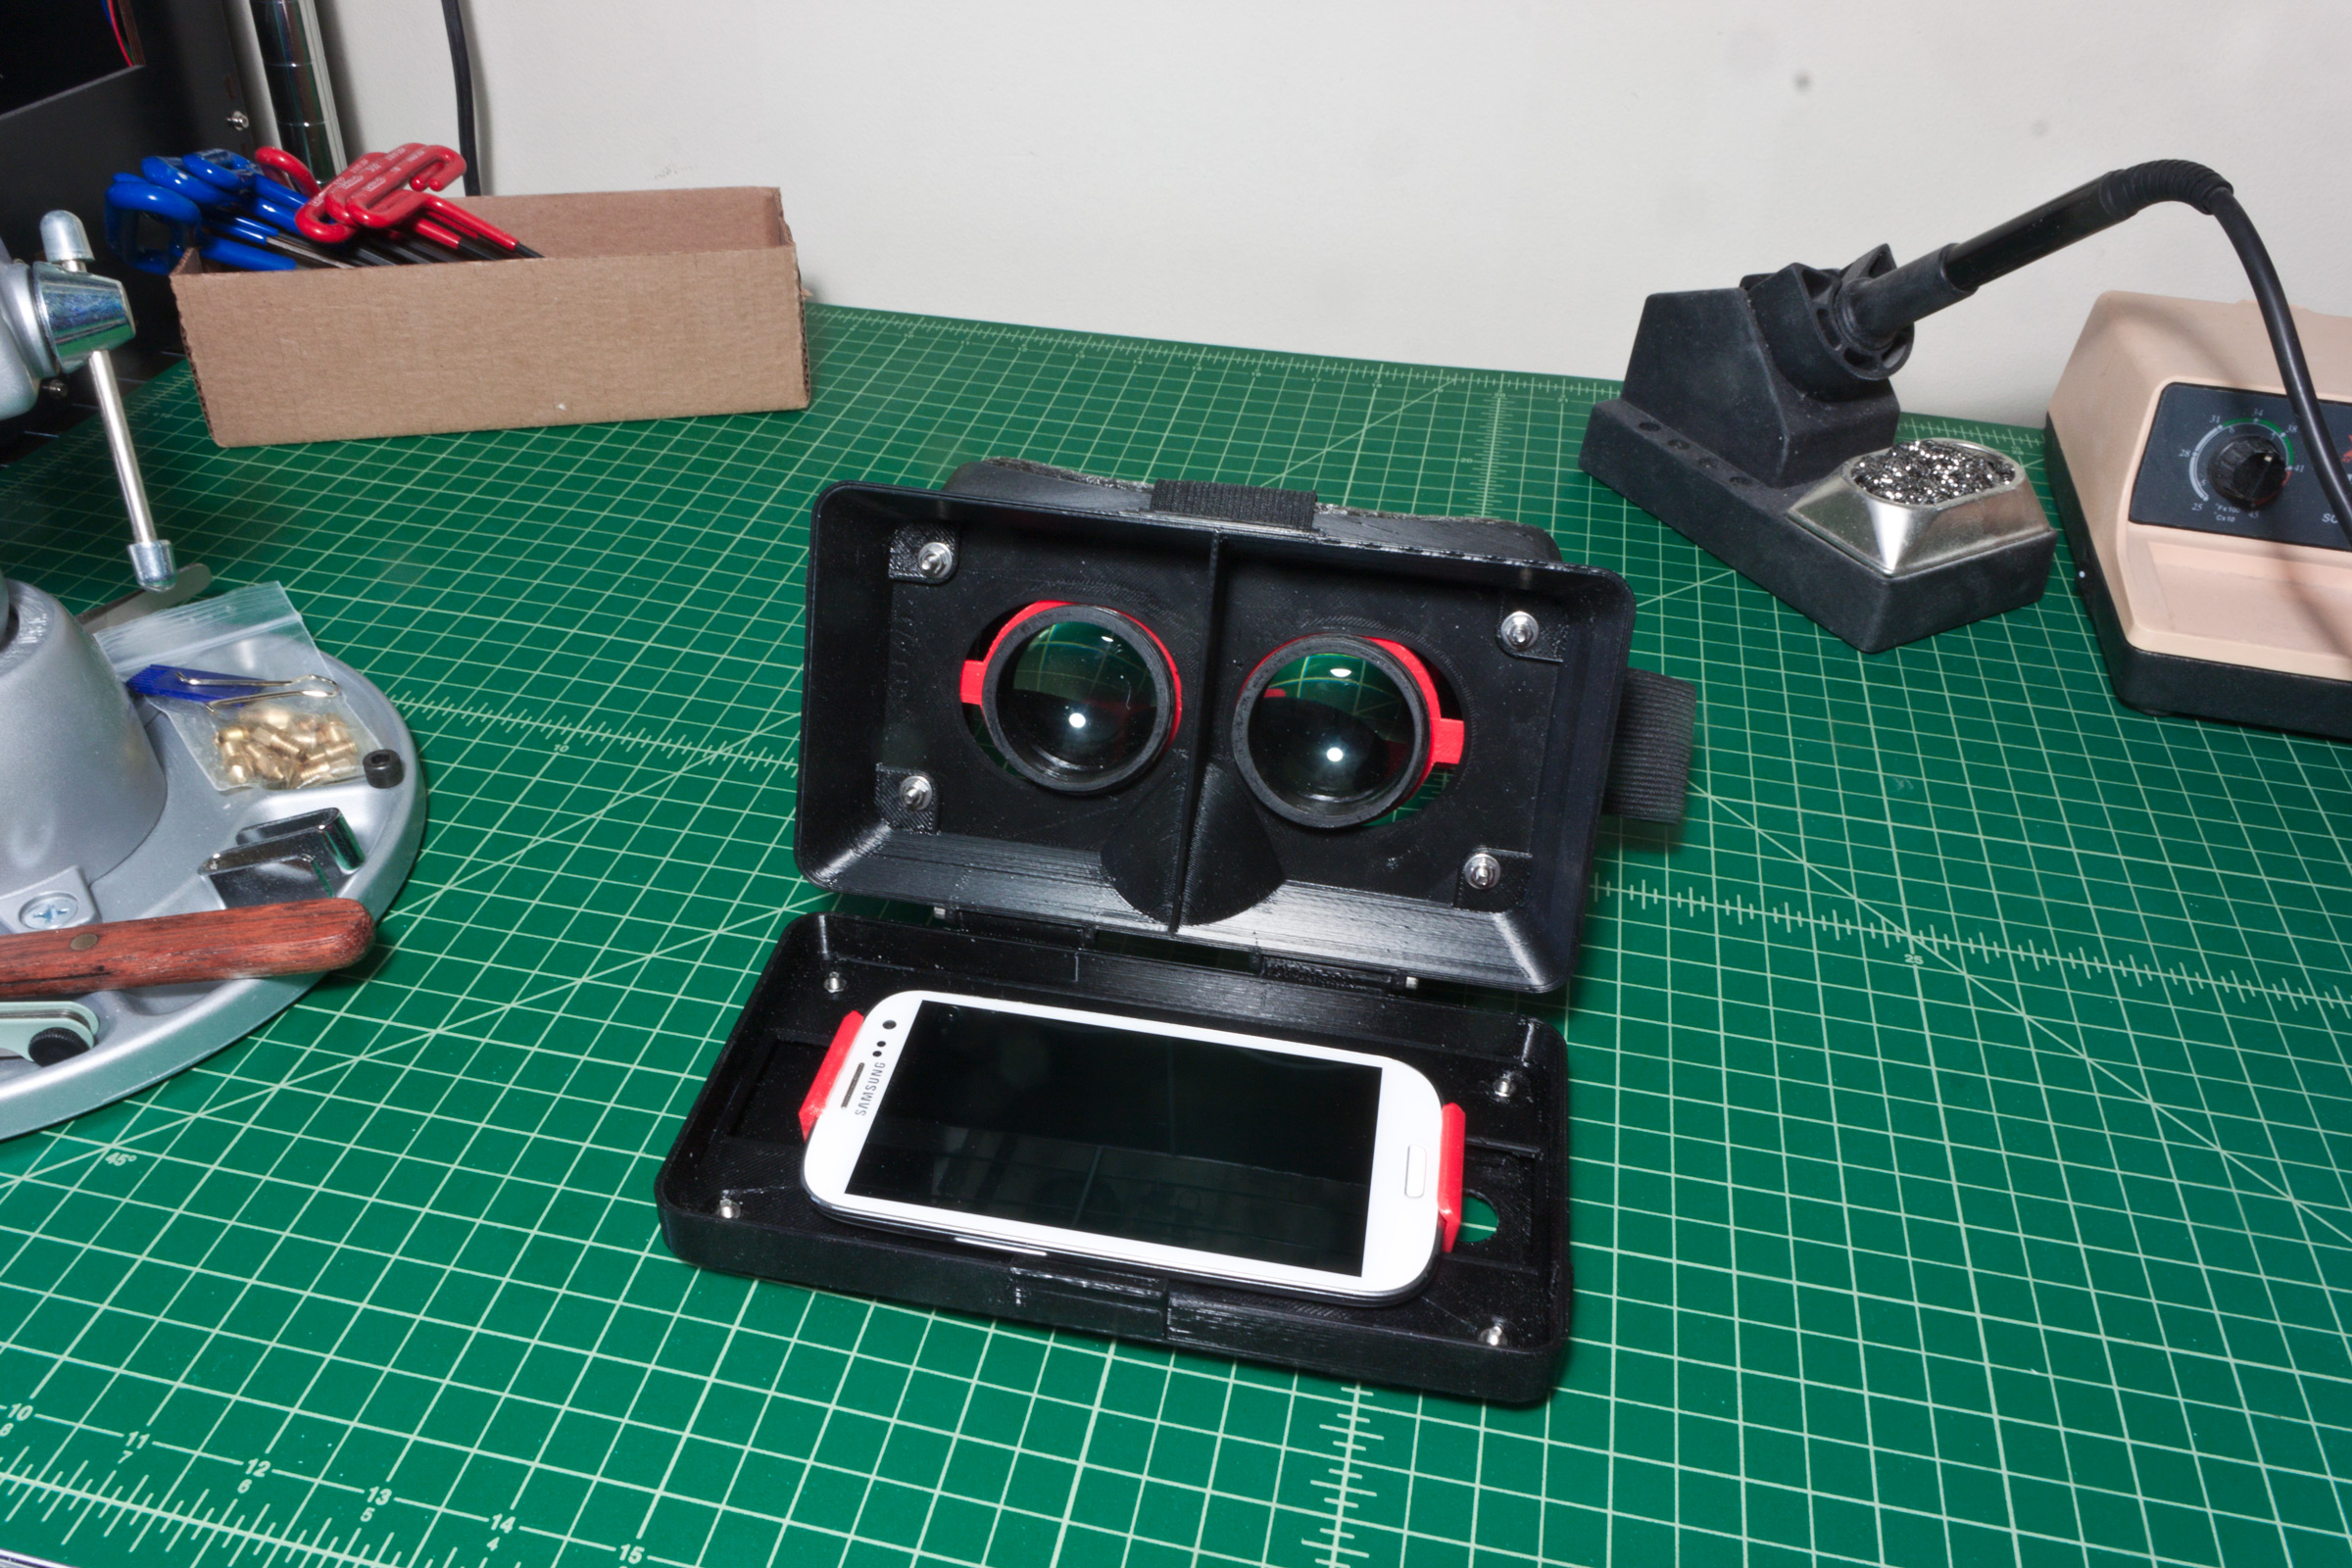
I couldn’t actually get PTFE tubing via Amazon Prime, so I had to order it from China– meaning it will be here whenever it bloody-well feels like it –and instead I ordered some PFA tubing that was rated for the same temps as PTFE.  Anyway, that’s a god damned lie, because when I went to print PETG, the god damned PFA tube liquified.  Not ‘melted’, not ‘distorted’ or ‘deformed’…it straight-up fucking liquified, leaving a quarter-inch blockage of rock-hard PFA in the end of the barrel.  Managed to get printer back up and running by using one of the new nozzles, and the old barrel, and cutting the original PTFE liner so that it’d fit. (And thus removing the part that’d been all crinkled up.)

Melted PFA tubing.

Melted PFA tubing.

Week 36, 2015 – September Acquisitions

Well, let’s see here…  First of all I got a replacement part for my computer chair, because the bloody thing basically broke in half a week or so prior… I actually found a reinforced one on Amazon with Prime shipping, and had it overnighted for the extra four bucks!  But we’re not here to talk about that.

I got a whole lot of cool stuff, some of it very important. Details after the jump! (Pictures are coming) Read more…

Week 23, 2015 – We Are Now In Control (Part II)

In the previous post I talked about the mod I made to turn the practically useless rotary dials on the X36’s throttle into a pair of On-Off-On momentary switches.  Well, Elite: Dangerous is a very demanding game when it comes to controls…  It’s not quite up there with Steel Battalion… Nonetheless, there’s a lot of ship functions you might want to have at-hand… Landing gear, cargo scoop, exterior lights, chaff, shield cell (consumable power cells to dump power into shields), silent running… All sorts of stuff.

First I needed a controller board… I had an old USB arcade controller board sitting around, so I reused that. (Just takes a bunch of simple on/off inputs and turns it into a game controller.)  The second hurdle was designing the switches… The toggle switches I have are relatively small, and besides being hard to hit in the heat of the moment, they’d also kinda hurt. So I decided to design and 3D print caps for them like I did in the previous article.  I also wanted guards to separate the different switches in the bank.  Well, I found both solutions in the same place; the design of the switches and switch guards in the Space Shuttle cockpit.

mct_placeholder

Drawings of the parts.

mct_placeholder

Prototype parts.

mct_placeholder

Test assembly.

The next problem was figuring out how to attach it to my flight controls… I ended up settling on designing and 3D printing a little housing that hook into the keyed holes in the throttle’s underside for the optional suction cups that let you secure it to a surface, and at the top I simply added tabs that went under the pre-existing case screws.

It ended up being a very elegant little solution, though I’d certainly like to revisit it at some point to make it even better.

x36switchpanel_02

The assembled switch panel, showing the mounting points.

x36switchpanel_01

The assembled switch panel.

I’d like to to try this again, with laser cut/etched acrylic for the panel… Because then I could add backlit markings and the whole deal.  I’d also, of course, like to try making the switch parts out of actual aluminium.

First though, I need to come up with a better method of attaching the parts to the switches– such as threading the shafts of the switches –as well as a method to shorten the shaft to better accommodate switches the way I want them. (Example: The thumb switches on the throttle have an additional like 4-6mm of height because of how far up into it that shaft of the switch has to be concealed.) And of course, having them threaded, with threaded inserts in the caps, would prevent them from rotating.

Anyway… Those are conversations for another day!  Here’s what it looks like assembled:

x36switchpanel_03x36switchpanel_04


Week 22, 2015 – We Are Now In Control (Part I)

Ever since I saw a magazine ad for one over a decade and a half ago (Yes, a magazine, like the printed-on-paper kind!) I desperately wanted a Saitek X36 HOTAS, but they cost like $200 and that was the gameport version! They later released a version that also had USB, but by then I had too much other stuff on my mind and years passed (As they tend to do.) until finally, a few years ago, I snagged one on eBay for $12 shipped (!?) and then a few months later another for like $30, because why wouldn’t I have spares?  This was of course just in time for the Elite: Dangerous hype.

x36throttlemod_01

A little worse for wear, but not bad for being over a decade old, and certainly not bad for $11.95 including shipping!

But, because this is me we’re talking about, things cannot possibly be that easy, can they? Read more…

Week 20, 2015 – I Can See For Miles and Miles…

For quite some time now I’ve been interested in computer-generated stereoscopic 3D graphics and the required display technology… And for quite a bit longer I’ve been interested in virtual reality.  As an extension of my previous work on head-tracking for Elite: Dangerous and thanks in no small part to my little sister’s generous donation of her old Samsung Galaxy SIII– Having upgraded to some manner of S5 –I decided to work on a DIY VR headset.

The Hardware

First, I got this design off Thingiverse, just to try it out… It was okay, but hard to work with.  I used these bi-convex lenses off Amazon…which, at the time, were almost 50% less…  Later I settled on this design, but had to scale it up slightly to fit the lenses I already had.  I used springs from this assortment for the phone holder, and this 1.5″ elastic webbing for the head straps.  The fasteners are all 14-4 Stainless Steel 3mm SHCS, nuts, and washers, from Bolt Depot.  The webbing hardware is all printed as part of the headset design.

It all turned out rather well.

BakaVR_mk2_01BakaVR_mk2_02BakaVR_mk2_03BakaVR_mk2_04BakaVR_mk2_05

The foam was just some random stuff I had lying around because I couldn’t find what I wanted to use… I later DID find where it was hiding, so here’s what’s on there now: McMaster #8694K144 Weather-resistant Neoprene Foam, adhesive back, 3/8″ wide, 1/2″ thick.

Overall everything was great…having to make it like 7.5% larger to accommodate the lenses I bought for the other design was less than ideal though. Obviously I need to experiment further.  I want to design my own headset along these lines, but with a mind given to sturdy manufacture and keeping dust out.  For starters I want to design it for heat-set threaded inserts. instead of fastening everything with nuts and bolts.  Another thing I will do is NOT make the cover that the phone is attached to rely on a friction fit to stay closed! That damned thing always flops open. :|

The Software

For the software I was using TrinusVR in USB mode…it was also less than ideal…but it was more than workable.  The software basically streams the currently focused application to your phone. It can even do ‘fake 3D’ if the image you’re sending isn’t already SBS3D, and it does lens correction, and can even fake head tilt. It can pass head-tracking back to the computer from the phone’s sensors in the form of FreeTrack, TrackIR, Mouse emulation, and other methods.

Future Developments

Since the major drawbacks of this current solution are resolution and the required processing power and bandwidth on the hardware side, and a combination of game incompatibilities and TrinusVR’s limitations on the software side, the next step in development should be to do away with the phone altogether in favor of a small high-resolution screen.

I’ve seen 6″ IPS panels on AliExpress and and eBay for as little as $200 that offer 2560×1440, connect via HDMI, and are powered via USB. That’d be perfect, especially paired with a USB 9DOF tracker that emulates a standard joystick input… I wonder where I can get one of those… ;)

MADE COOL THING – Filament Spool Holder

Well, here it is.  This is what I consider to be my first ‘real’ part.  I mean, sure, I designed that webcam mount and a few other things, but they were all crude early attempts.
Simple Smooth Spool Holder

I decided that a spool holder was going to be absolutely essential.  Besides just making it a pain in the ass to change, having the spools mounted to the back of the printer caused a lot of feeding friction– though I never had a jam, I did have a particularly brittle transparent ABS filament snap off at the extruder a couple times because it took too much force to feed it –and most importantly it makes it impossible to put the printer on my 14-inch deep wire shelving.  I wanted to be able to mount the spools above the machine, make them as fast and easy as possible to swap, and make it feed as smoothly as possible. To take care of that last point, I knew that whatever I did, it was going to need to involve bearings of some kind.

Mechanical drawings.

Mechanical drawings.

At first, I thought about other designs I’d seen, like a horizontal post that the spool hangs on,
with a single straight race loaded with like quarter-inch ball bearings, which the spool rests on…  But mounting that would be problematical, and there’s no guarantee that the balls would roll smoothly.  It also wasn’t necessarily universal.  In the end, I settled on a very simple and elegant concept; just have each rim of the spool rest on a pair of skate bearings spaced apart by a printed frame.

Assembly diagram.

Assembly diagram.


The end result was some beautiful work, with some additional cutouts to lighten it up and reduce material usage and print time. (I later found out that the reduction in print time was negligible, depending on the print settings, because of the additional time spent printing perimeters.)

And it printed just as good as it looked…which is something I could definitely get used to.

The printed parts.

The printed parts.


I put them to use immediately, moving the printer to the shelves, and setting up the filament spools above it.

The spool holders in action.

The spool holders in action.

I need to design and print some little clips that attach to the spool holders, and then to the wires of the shelf… I purposely avoided integrating a shelf attachment method to allow for flexibility in their use.  In future design iterations, it might be useful to include some manner of guide tube near the front or something, so I can just plonk the spool down on the holder, feed the filament into the tube, and have it come out where I want under the holder.  Because currently, I have to stick the filament through the shelf first, before I set the spool down, so that the filament is coming down from the center of the spool…this is less than ideal.  I think it’d also be cool to print them in Taulman Bridge filament, so the finished parts would be nigh-indestructible!

UPDATE! 2015-08-30 Posted to Thingiverse!

Thingiverse and MakerBot are running a contest, #FilamentChallenge, with first prize being ten spools of either MakerBot ABS or PLA.  The challenge is to design a spool holder, so I submitted this design. You can find it on Thingiverse here! It’s my first submission to Thingiverse, but it won’t be my last.

And by the way, you can see that nearly six months later, the spool holders are still working perfectly.

Still in service, six months later.

The spool holders are still serving me well, six months on.

Week 06, 2015 – 3D Printering

First off, I’m sure there’s some questions anyone interested in getting their own 3D printer might have, so I’ll try to answer the most basic ones:

Where did you get it?

eBay.  It’s a CTC 3D branded Chinese copy of the original dual-extruder MakerBot Replicator.  I got it for $550.90.  Though it dropped another $50 days later. That got me the printer, a 1kg roll of (in my case) no-name red PLA filament, a bag of screws and stuff, an SD card, etc.  Shipped via FedEx.  EDIT: As of February 21st, the price seems to be back up to the original $700, which is unfortunate.

How good of a copy?

Well, I replaced the generic firmware it came with– which I guess is based on an earlier open source MakerBot firmware –with the latest official MakerBot firmware, right from within MakerWare… Yeah.  In fact, the hardest part was getting the damned timing right for hitting the reset button on the back of the printer, so that the controller board is rebooting just as you try to upload. Basically, other than probably skimping on material quality where they could (Though that doesn’t seem to be a problem… I mean, other than the working bits, it’s already just made out of plywood anyway.) the only difference between this and a vintage MakerBot machine would seem to be the lack of a MakerBot ‘M’ button as the interface’s enter key. Only time will tell how durable it is.

Any problems so far?

Mostly just me trying to climb the learning curve, and tumbling back down.  Though the bed is slightly uneven– it dips in the center –but that’s a very common problem regardless of the printer.  And hopefully that’s been resolved, as I’ve got a 0.25″ borosilicate glass plate to put on there that’s flatter than anything.  Haven’t installed it yet though.  It’s also a wee bit rattletrap; when it arrived, it’d already lost a bolt from the housing (I eventually found the nut in the box, and reinstalled it.) and one of the bolts at the back of the print bed, that hold in the upright section behind it, came undone and fell out… That was a bastard to put back in.  Basically, I’ve just gotta make sure to snug everything up, and get some loctite the next chance I get.  Luckily it does come with a bag full of extra hardware.

What are you using for filament?

I bought a little over $200 worth of HATCHBOX brand filament from Amazon, via Fire Sale Merchant. (Fulfilled by Amazon, though often it will default to getting it direct from Fire Sale Merchant without the benefit of Prime and you have to choose the ‘Fulfilled by Amazon’ one under other sellers.)  They seem to be the only source for this brand of filament.  Both their PLA and ABS are very nice, though their ‘transparent’ ABS is a bit of a misnomer… It’s more of a ‘translucent’, at least, without post-processing to reduce the diffusion properties of the surface. (Haven’t tried that yet.) Sadly the prices for the 1KG spools have gone up $6 to ~$30 since I bought mine.

Anything else?

Well, I’ve been keeping some notes on print quality– such as the fact that the transparent white ABS extrudes better at 245°C but I need to do some proper test parts. (Like extrusion temperature/speed tests) I’ll tell you this though; Elmer’s purple glue sticks do wonders for making prints stick to the bed regardless of filament/substrate…even combinations like PLA directly on a Kapton-covered printbed.

What’s next?

I want to get some HIPS and a gallon of Limonene, some PVA, some NinjaFlex, some carbon fiber filament, some T-Glase, some Taulman 618, some Taulman Bridge, and a copy of Simplify3D.  Once I get experience with dissolvable support materials, flexible materials, high-strength nylon and reinforced ABS, and other exotic materials, I should have a pretty good handle on the current 3D printing landscape… Plus I’ll have that much more to offer on 3D Hubs.

Go back to top